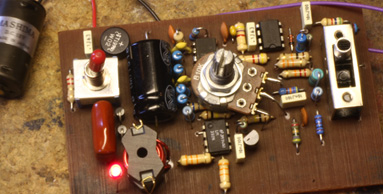
Snitzlspeed Controller : Stumbled across the method of using a laser printer to create printed circuit boards on the internet and thought I'd present my experiences with this method as a blog. Not having the appropriate software for creating circuit board artworks, I actually photographed the trackside of a now discontinued controller from the 1990's, made a few alterations, coloured the track in black, mirrored the artwork and then printed nine copies of the artwork onto a piece of A4 gloss photo paper. Having cut out one of the circuit board artworks, a piece of single sided copper clad board is cut to size, rubbed with fine emery paper and given a scrub with hot water and Vim, when dry, the artwork is then placed face down onto the copper surface and ironed with a clothes iron on a full heat setting. It turns out that the print produced by laser printers and photocopiers, is styrene, the same plastic stuff that most of our buildings are made of, therefore the clothes iron generates enough heat to actually melt the plastic which then adheres to the copper surface. Next, the circuit board and artwork are given a bath in warm soapy water, and after a few mintues, the photo paper can be pealed away. The first circuit board attempt turned out well and needed no further work, however, the second board showed signs of artwork movement during the ironing stage and on the third attempt, three tool makers clamps were used to hold the artwork firmly in place. Another noticeable problem was that tiny areas of gloss laquer from the gloss photo paper had also adhered to the copper surface, these were easily removed with a gentle rub with a soft cloth and T-Cut.
Other Thoughts.
Not tried this yet, but the same method of artwork heat transfer might be possible with a controller facia, with the facia in aluminium.
<< Back to Main Blog.
Other Thoughts.
Not tried this yet, but the same method of artwork heat transfer might be possible with a controller facia, with the facia in aluminium.
<< Back to Main Blog.


